Illustrator is one of those programs that I find a little frustrating to use, because I am the type that wants to just start playing around, figuring out how to do things intuitively, and Illustrator doesn't always reward free play in that way. However, once you figure out certain ways that Illustrator works, it is very powerful, indeed. One of the feature that always puzzled me was Blends—until now. You see, I've been playing with blends (a lot) and now I'm going to pass on the basics so you, too, can play along at home.
I'm using Illustrator CS2 on a Mac for this tutorial, but the techniques should work with any version that supports blends.
Basically, a blend in Illustrator-language, is a relationship between two (or more, as we will see) objects. I'll be mostly working with objects with just a stroke (you might think of these as simple lines and curves) and no fill, although the program can also blend fills. For now, I just want come cool linear patterns I can use in my graphic design work, so I'll leave the fills off, with one exception we'll get to in awhile.
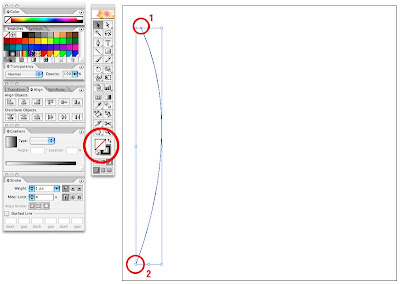
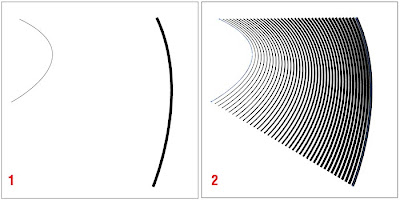
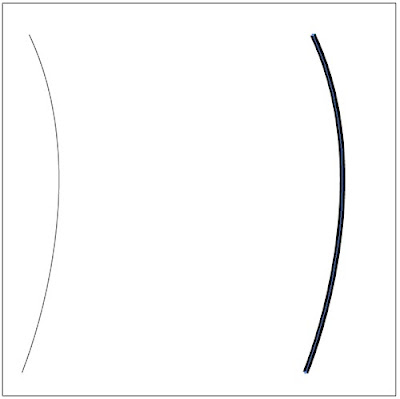
Here's how it works. Open a new document in Illustrator. In the Tools palette, set the fill to none (it should have a diagonal red line through it) and the stroke color to black. Draw a simple curve using the pen tool. My simple curve has only two points. Select the Selection tool (press v), click away from the curve, then click directly on it. You can also click and drag across the curve to select it.
Holding down the Option (Alt) key, drag the line to the right. By holding down the Option/Alt key, we are actually copying the curve. Now, double-click on the Blend Tool (in my version, it's the tenth tool down in the right column) to open the tool settings dialog. Change the Spacing to Specified Steps, then enter a number in the box to the right. This tells Illustrator how many copies to place between our two curves. Click OK.
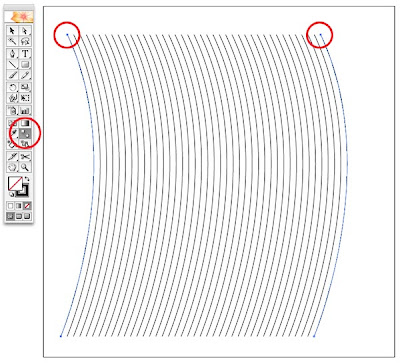
With the Blend Tool still selected (or, press w to select it), move your cursor over the top point on the left curve. You will see the small circle fill with black when your cursor is over the point. Click on the point. Now, move the cursor to the top point on the right curve and click. Illustrator now draws the blend based on the settings we specified in the tool settings dialog.
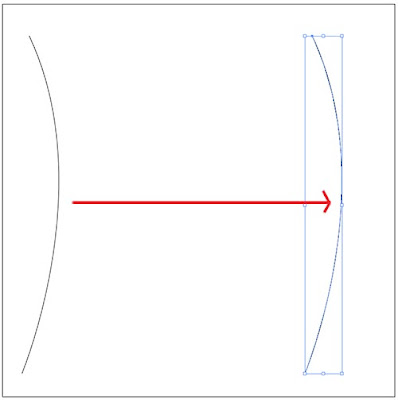
This is pretty bland, so let's start to jazz it up a bit. Undo (Command-z/Control-z), or you can release the blend by pressing Shift-Option-Command-b (Shift-Alt-Control-b). Whew! Change back to the Selection tool (press v) and select just the right curve. Change the stroke weight to something heavier, like 6. Press w to get back to the Blend tool, and again click on the two top points. That's more interesting, isn't it?
Undo. Now let's change the width and height of the left curve by selecting it with the Selection tool (v) and dragging on the resize handles. Both our curves still have only two points, but now they have different weights and different shapes. Use the Blend tool and you can start to see how powerful blends can be.
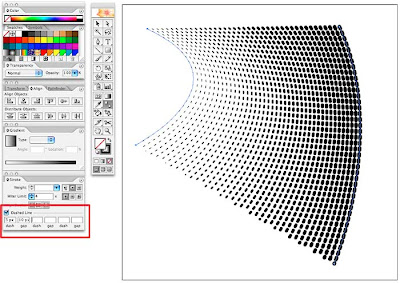
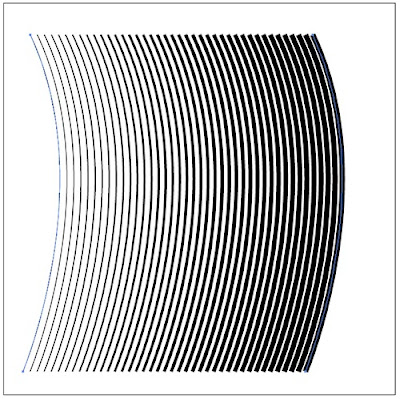
Without undoing or releasing the blend, go to the Stroke palette and click the Dashed Line box. Play around with the settings for dashes and gaps, change the end cap shape to rounded, and see what happens.
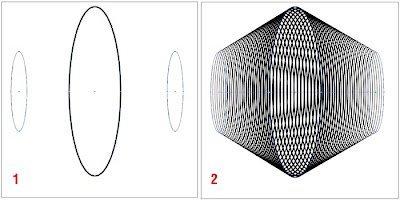
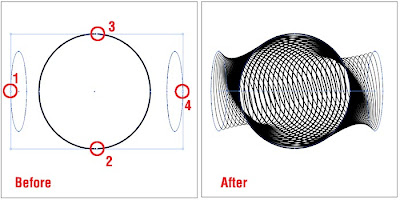
Of course, we're not restricted to blending just two objects. Starting with three ovals, the outer two with a 1 pt stroke and the middle one with a 6 pt stroke. To blend these three, just use the Blend tool and click on the top points of all three ovals in sequence. Pretty neat. But wait, there's more! There's no reason we have to stick to using just the top points of our ovals! For the next example, click the points in the order shown for an even trippier result.
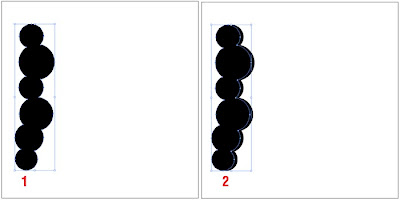
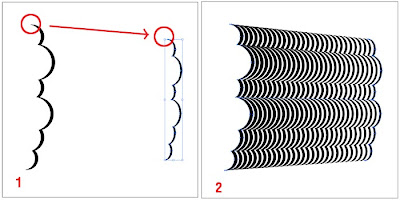
Now let's try blending something more complex, with thick and thin parts. I started by swapping the Stroke and Fill colors (so I ended up with a black fill and no stroke) and drew a series of overlapping circles with the Ellipse tool (hold down Shift while drawing to get a perfect circle). Using the Selection tool (v), I selected all of the circles. If it's not already open, open the Pathfinder palette (Window>Pathfinder) and click on the first icon (for Unite). Once you've clicked on Unite, click the Expand button (Illustrator by default remembers all the shapes that we started with, but by expanding the combined shape, it treats the united circles as a unique shape). With the Selection tool, hold down Option, click on the shape and move it a little to the left. If you press Shift while dragging, it will move it perfectly horizontally. We now have two shapes, one just slightly peeking out from under the other. Select both shapes with the Selection tool (here's a good time to just drag across both shapes—start away from the shapes and just drag a small rectangle over both to select them).

Back on the Pathfinder palette, click the second icon, Subtract, to subtract the left shape from the right shape. Click Expand. Now we have a shape with thick and thin arches. Let's blend it! For this example, I copied my shape (Option-drag with the Selection tool), then resized it slightly before blending the two shapes. Very nice.
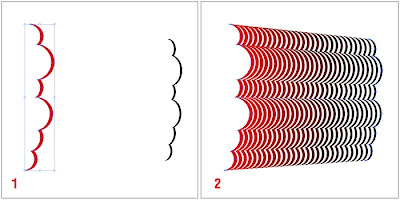
Undo, select the left shape and change its fill color to red, then reblend. Illustrator is now blending both the shapes and the colors.
As usual, this tutorial barely scratches the surface of what you can do with blends. Play around, try all sorts of things. Try blending different shapes (although Blends work most predictably when the objects being blended have the same number of anchor points). In closing, here's a Photoshop illustration using several of my blends in the background. Have fun.


 Summer has arrived on the island, at least for this week, and my thoughts have turned to interesting, refreshing beverages to sip while we relax in the garden.


