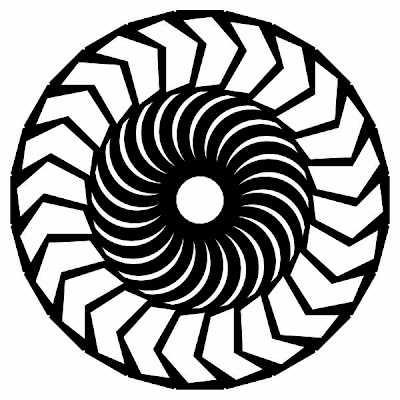
For this tutorial, I am using Illustrator CS2 on a Mac, but the steps are the same for Windows. Keyboard shortcuts are shown for Macs first, and Windows second.
To begin, I set up my workspace by creating a new document, turning on Rulers (Command+R/Control+R). Turn on Smart Guides (View>Smart Guides). Click in the vertical ruler and drag a guide out to the middle of your workspace; do the same for the horizontal guide. (Remember, click on an image to see it larger)

I want to create a crescent shape to rotate to make my final design. Although I could try to draw this using the pen tool, it's much easier and faster to use the Oval tool. Select the Oval tool from the toolbar, hold down the Option/Alt key (this draws your shape from the center) and click and drag from some point on the vertical guide line. Once you start dragging, also press down the Shift key to create a perfect circle. Give this circle a color fill of your choice and no stroke. Position this circle so its lower anchor point rests on the intersection of the two guide lines.

With this circle still selected, choose the Rotate Tool from the toolbox (just press the R key). Hold down the Option/Alt key and click on the bottom anchor point of your circle. This sets the origin point for your rotation at this location. A dialog box will open. Check the box for Preview so you can see what you're doing, then enter a value in the Angle field. For this sample, I used 20°. Now click the Copy button to create a copy of your circle that has been rotated 20° on the bottom anchor point.

Choose the Selection tool (press V) and click and drag over both circles to select them both. If the Pathfinder palette is not open, open it by selecting Window>Pathfinder. Move your cursor over the icons and wait a second to see what they are; we want the one marked Subtract, second from the left. This will subtract the uppermost shape (the rotated circle) from the lower shape (our original circle), leaving a crescent. Click the Expand button on the Pathfinder palette to make the crescent its own shape (otherwise, it remains the result of the subtraction, while remembering both circles, which we don't need for this exercise).

You can now rotate copies of this crescent around any point you set with the Rotation Tool. I want something that creates a "hole" in the center, so I moved my crescent as shown in the screen shot. I also rotated my crescent just a little. Select the Rotation Tool (press R), hold down Option/Alt, and click where you want the rotation point to be. I clicked the intersection of the guidelines. In the dialog box, I again chose 20°, then pressed the Copy button. This will create a copy of the crescent, rotated 20° on the point you clicked with the Rotation Tool (you must hold down Option/Alt when clicking to get the dialog box). To create a regularly spaced ring, you must enter a number in the Angle box that is a factor of 360° (eg, 6, 10, 12, 15, 20, etc.)
Now that you have created and rotated one copy of the crescent, simply hold down the Command/Control key and press D multiple times to copy the shape around the circle. This can be really fun to watch as your final design takes shape. If you don't like the way things are shaping up, just press Command-Z/Control-Z as many times as it takes to remove all but your original crescent.

In the example shown here, I set the blend mode of my original crescent to Multiply, so that where the crescents overlay each other they create a darker shape. Play with the different blend modes, as well as the transparency of the original shape to create some very cool effects. Also, play with the rotation and position of your shape—sometimes the results are startling (and sometimes they're…not).
Here are two more examples of other shapes rotated in this manner. Warning: this can be really addictive!


No comments:
Post a Comment